
Turbo removal


Senior Member
Joined: Apr 2020
Posts: 1,077
Turbocharger LH
RemovalNOTICE: Whenever turbocharger air intake system components are removed, always cover open ports to protect from debris. It is important that no foreign material enter the system. The turbocharger compressor vanes are susceptible to damage from even small particles. All components should be inspected and cleaned, if necessary, prior to installation or reassembly.
NOTE: Some turbos are equipped with a heat shield, heat shields were deleted and some service turbos will not have mounting bosses for the heat shield.
- With the vehicle in NEUTRAL, position it on a hoist.
Refer to: Jacking and Lifting - Overview (100-02 Jacking and Lifting, Description and Operation).
- Remove the engine appearance cover retainers and then remove the engine appearance cover
- If equipped, remove the retainers and the transmission housing cover.
- NOTE: Vehicles come with a skid plate or a splash shield.
If equipped, remove the bolts and the skid plate or splash shield.
- Drain the cooling system.
Refer to: Engine Cooling System Draining, Vacuum Filling and Bleeding (303-03A Engine Cooling - 2.7L EcoBoost (238kW/324PS), General Procedures).
- Remove the LHF fender splash shield.
Refer to: Fender Splash Shield (501-02 Front End Body Panels, Removal and Installation).
- Remove the Air Cleaner Outlet Pipe LH.
Refer to: Air Cleaner Outlet Pipe LH (303-12A Intake Air Distribution and Filtering - 2.7L EcoBoost (238kW/324PS), Removal and Installation).
- Remove the LH CAC intake pipe.
Refer to: Charge Air Cooler (CAC) Intake Pipe (303-12A Intake Air Distribution and Filtering - 2.7L EcoBoost (238kW/324PS), Removal and Installation).
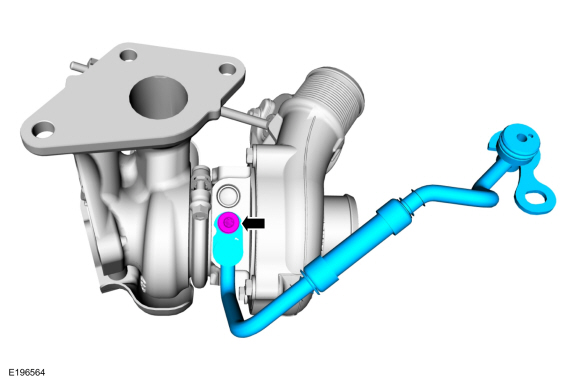
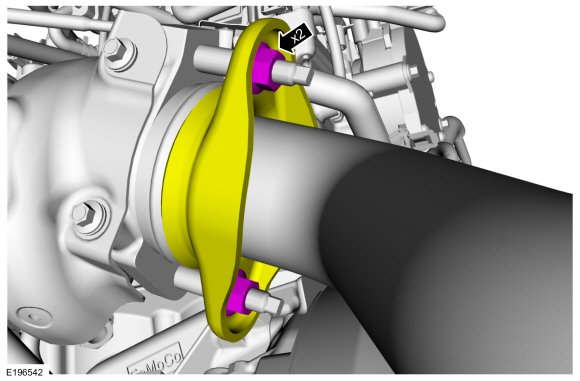
- Remove and discard the TC exhaust flange nuts.

- Remove and discard the TC exhaust flange studbolts.

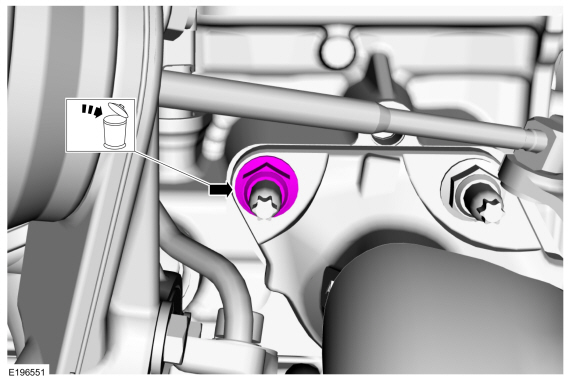
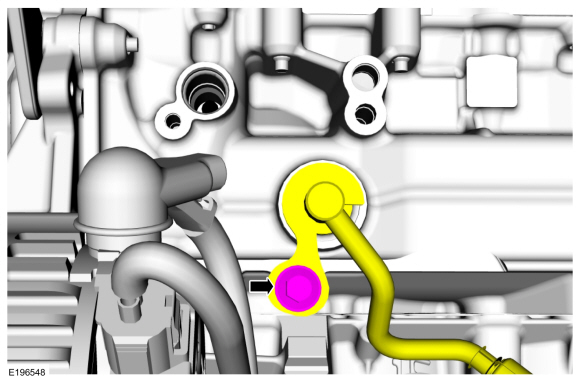
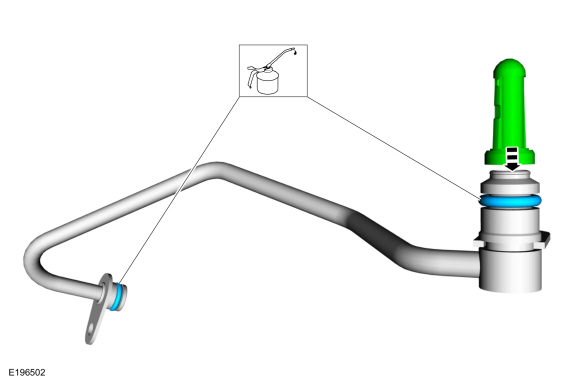
- Remove the TC coolant return tube bolt, then loosen the spring clamp, disconnect and remove the TC coolant return tube.

- Remove and discard the TC coolant return tube O-ring seal.
- Disconnect the clamp and the TC wastegate control hose.

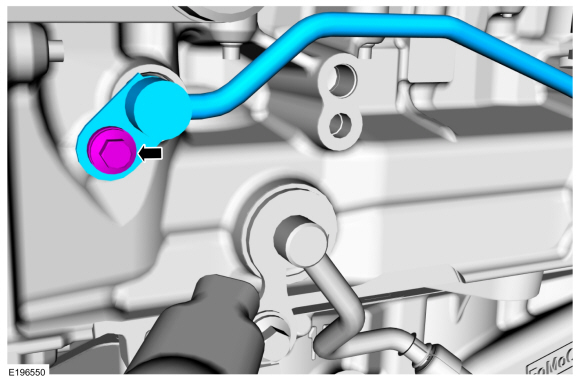
- Remove and discard the upper left TC nut.
- Remove and discard the upper left TC mounting stud.

- Remove the TC oil supply tube bolt and then disconnect the TC oil supply tube from the TC.
- Remove the TC oil supply tube bolt and then remove the TC oil supply tube.
- Remove and discard the TC oil supply tube O-ring seals and the TC oil supply tube oil filter.

- Remove the TC oil return tube bolts and then remove the TC oil return tube.
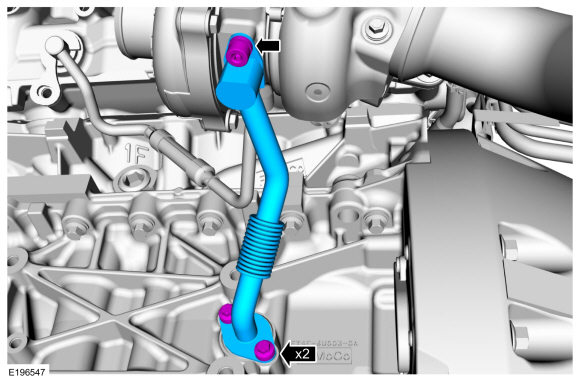
- Remove and discard the TC oil return tube O-ring seal.
- Remove and discard the TC oil return tube tube-to-engine block gasket.
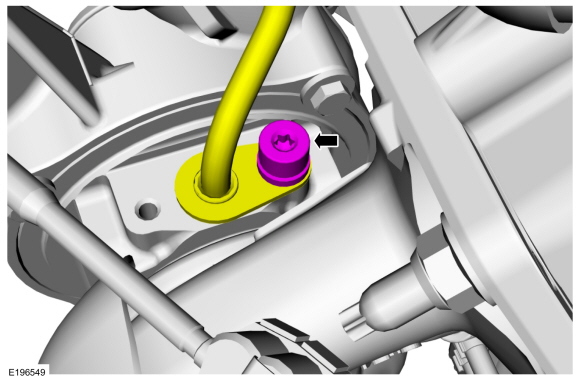
- Remove the TC coolant supply tube bolt.
- NOTE: Remove the TC coolant supply tube from the engine block while removing the TC.
NOTE: Make sure that the mating faces are clean and free of foreign material.
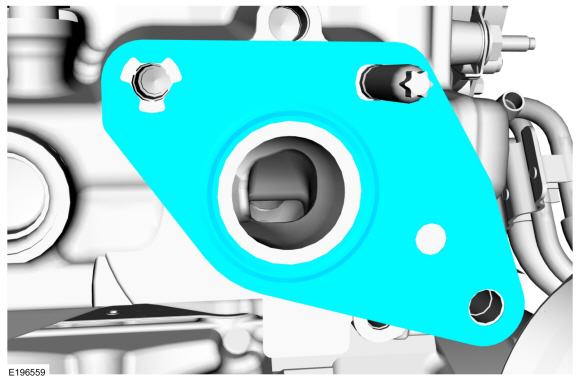
Remove and discard the TC retainers and then remove the TC.

- Remove and discard the TC coolant supply tube O-ring seal.

- Remove and discard the TC gasket.

- Remove and discard the TC mounting stud.

- Remove and discard the TC exhaust flange gasket.

- If needed remove the TC coolant supply tube bolt, and then remove the TC coolant supply tube from the TC.
- If the TC coolant supply tube was removed from the TC, then remove and discard the TC end coolant supply tube O-ring seal.

Senior Member
Joined: Apr 2020
Posts: 1,077
WHEN THE INSTRUCTIONS SAY TO TORQUE THE NUTS IN A SPECIFIC ORDER DO SO IN THAT GODDAMN ORDER.
Installation
NOTICE: Make sure that the mating faces are clean and free of foreign material.
NOTE: Some turbos are equipped with a heat shield, heat shields were deleted and some service turbos will not have mounting bosses for the heat shield.


Installation
NOTICE: Make sure that the mating faces are clean and free of foreign material.
NOTE: Some turbos are equipped with a heat shield, heat shields were deleted and some service turbos will not have mounting bosses for the heat shield.
- If the TC coolant supply tube was removed from the TC, then install a new TC end coolant supply tube O-ring seal. Lubricate the new O-ring seal with clean engine coolant.
- If removed, install the TC coolant supply tube to the TC, then install and tighten the TC coolant supply tube bolt.
Torque: 89 lb.in (10 Nm)
- Install the new the TC exhaust flange gasket.
- Install and then tighten the TC mounting stud.
Torque: 102 lb.in (11.5 Nm)
- Install the new TC gasket.
- Install a new TC coolant supply tube O-ring seal. Lubricate the new O-ring seal with clean engine coolant.
- NOTE: Install the TC coolant supply tube to the engine block while installing the TC.
Loosely install the new TC retainers. Install the TC coolant supply tube to the engine block while installing the TC.
- Install and tighten the TC coolant supply tube bolt.
Torque: 89 lb.in (10 Nm)
- Install the new TC oil return tube-to-engine block gasket.
- Install a new TC oil return tube O-ring seal and then lubricate with clean engine oil.
- Install the TC oil return tube, then install and tighten the TC oil return tube bolts.
Torque: 89 lb.in (10 Nm)
- Install the new TC oil supply tube O-ring seals and the new TC oil supply tube oil filter. Lubricate the new TC oil supply tube O-ring seals with clean engine oil.
- Install the TC oil supply tube, then loosely install the oil supply tube bolt.
- Connect the TC oil supply tube to the TC, then install and tighten the TC oil supply tube bolt.
Torque: 89 lb.in (10 Nm)
- Tighten the TC oil supply tube bolt.
Torque: 89 lb.in (10 Nm)
- Install and tighten the TC mounting stud.
Torque: 102 lb.in (11.5 Nm)
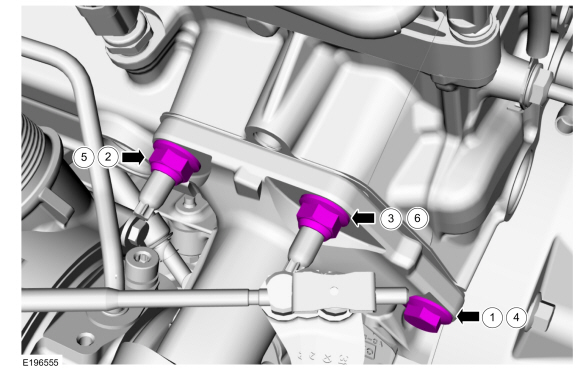
- Loosely install the upper left TC nut.
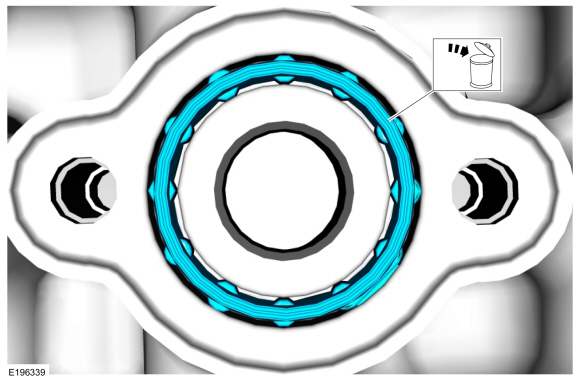
- Tighten the TC retainers in the following sequence.
- Tighten the bolt.
Torque: 44 lb.ft (60 Nm)
- Tighten the nut.
Torque: 44 lb.ft (60 Nm)
- Tighten the nut.
Torque: 27 lb.ft (37 Nm)
- Re-tighten the bolt.
Torque: 44 lb.ft (60 Nm)
- Re-tighten the nut.
Torque: 44 lb.ft (60 Nm)
- Re-tighten the nut.
Torque: 27 lb.ft (37 Nm)
- Tighten the bolt.
- Connect the TC wastegate control hose and clamp.
- Install a new TC coolant return tube O-ring seal. Lubricate the new O-ring seal with clean engine coolant.
Senior Member
Joined: Apr 2020
Posts: 1,077
- Install and connect the TC coolant return tube and clamp, then install and tighten the TC coolant return tube bolt.
Torque: 89 lb.in (10 Nm)
-
- Apply high temperature nickel anti-seize lubricant to the TC exhaust flange studbolt threads.
- Install and tighten the new TC exhaust flange studbolts.
Material: Motorcraft� High Temperature Nickel Anti-Seize Lubricant / XL-2
Torque: 30 lb.ft (40 Nm)

- Install and evenly tighten the new TC exhaust flange nuts.
Torque: 30 lb.ft (40 Nm)
- Install the LH CAC intake pipe.
Refer to: Charge Air Cooler (CAC) Intake Pipe (303-12A Intake Air Distribution and Filtering - 2.7L EcoBoost (238kW/324PS), Removal and Installation).
- Install the Air Cleaner Outlet Pipe LH.
Refer to: Air Cleaner Outlet Pipe LH (303-12A Intake Air Distribution and Filtering - 2.7L EcoBoost (238kW/324PS), Removal and Installation).
- Install the LHF fender splash shield.
Refer to: Fender Splash Shield (501-02 Front End Body Panels, Removal and Installation).
- If equipped, install the skid plate or splash shield, then install and tighten the bolts.
Torque: 30 lb.ft (40 Nm)

- If equipped, install the transmission housing cover, then install and tighten the retainers.
Torque: 71 lb.in (8 Nm)

- Fill the cooling system.
Refer to: Engine Cooling System Draining, Vacuum Filling and Bleeding (303-03A Engine Cooling - 2.7L EcoBoost (238kW/324PS), General Procedures).
- Install the engine appearance cover and then install and tighten the engine appearance cover retainers.
Torque: 42 lb.in (4.8 Nm)

- Check and top off the engine oil level as needed.
Material: Engine Oil - SAE 5W-30 - Synthetic Blend Motor Oil / XO-5W30-Q1SP (WSS-M2C946-B1)
- Start and check the exhaust system for leaks.

Thread
Thread Starter
Forum
Replies
Last Post