
3.0 flex eating oil and burning valves


Thread Starter
|
Junior Member
Joined: Jun 2015
Posts: 4
From: Jax FL
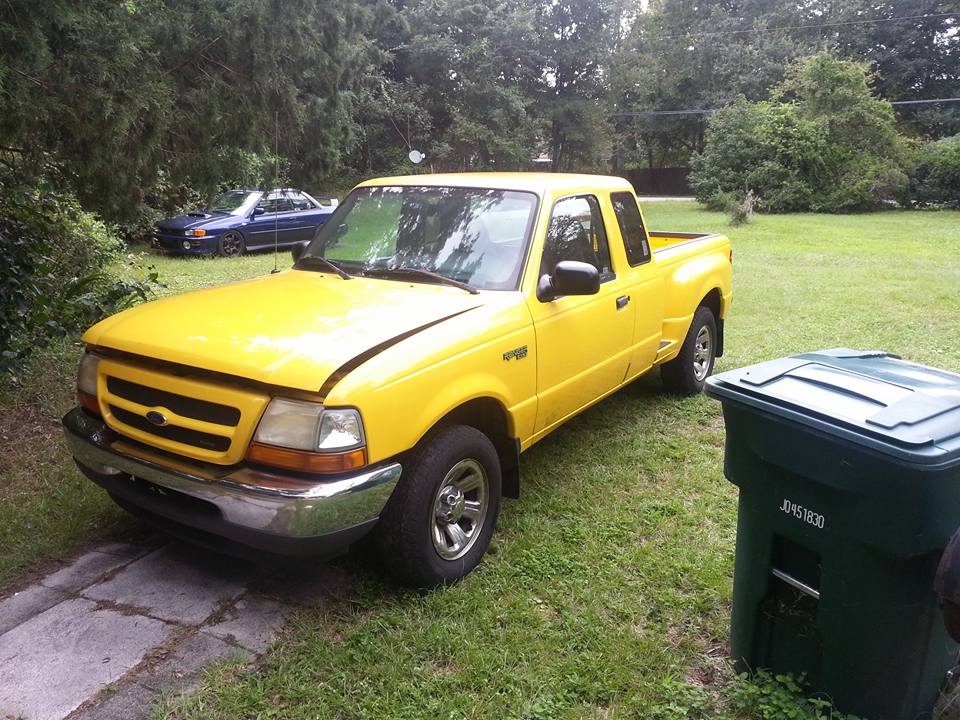
Have a 2000 Ranger with vulcan 3.0 flex fuel. Around 5 months back we had the heads rebuilt at a shop, apparently valve seats were gone and/or falling out (yeah, we drove for a while with bad compression, it sucked but you do what ya gotta do).
So when they had the heads re-machined they put in harder valve seats (non-flex fuel to help with longevity) and put in new gaskets of course. Everything ran like a champ for about a month. Then it ran out of oil on me one day. Come to find out that it now shews through about 2 quarts a week (avg. 140-210miles/week). Oil is not seen in driveway, changing oil and checking coolant shows no cross contamination there. It's coming out of the tail pipe and mostly white smoke during warm up or after idling long, otherwise don't notice much/if any smoke while on the road.
Checking spark plugs I could see that oil was clumping up on them in cylinders 2&5 (center cylinder on both sides), all other cylinders are fine. It was suggested that I check simple things like PCV valve, idle control valve, and fuel injectors (went ahead and replaced those items with all new parts myself as suggested). Still no change, no worse no better on oil consumption.
Now go forward a few months or so to today; driving it home one day and all of sudden it starts running like crap, like it did originally when valve seats were falling out. This prompted me to bust out the Haynes manual, borrow a loaner car from family, and take a stab at it myself. This is where things get weird IMO and before you skip and just reply, "piston rings shot for oil issue, and too much fuel burnt your valves, you need rebuild..." just stay with me.
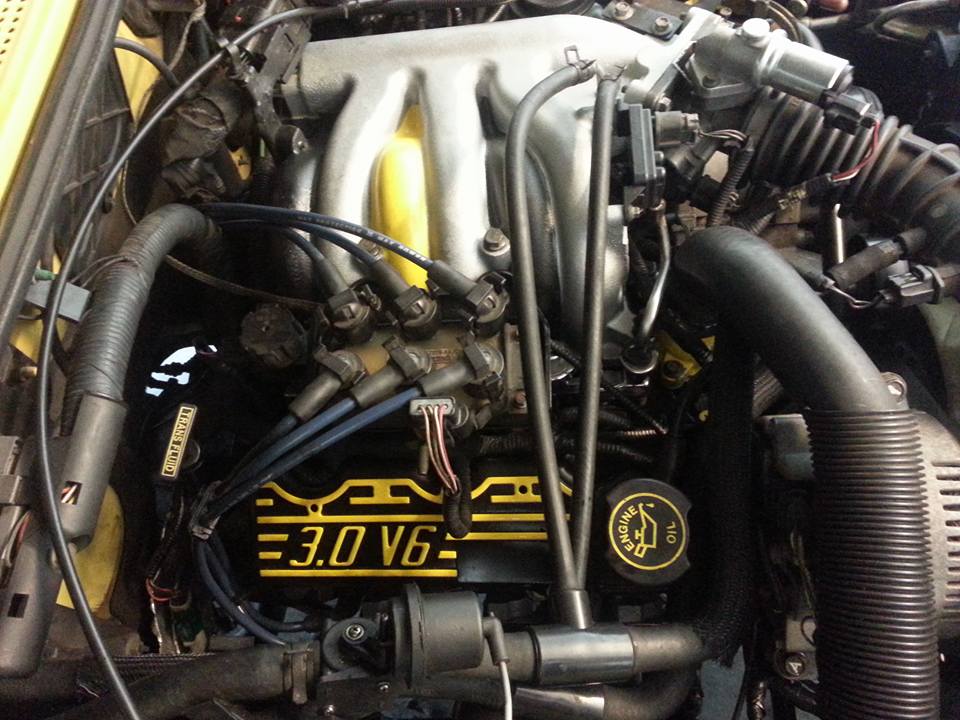
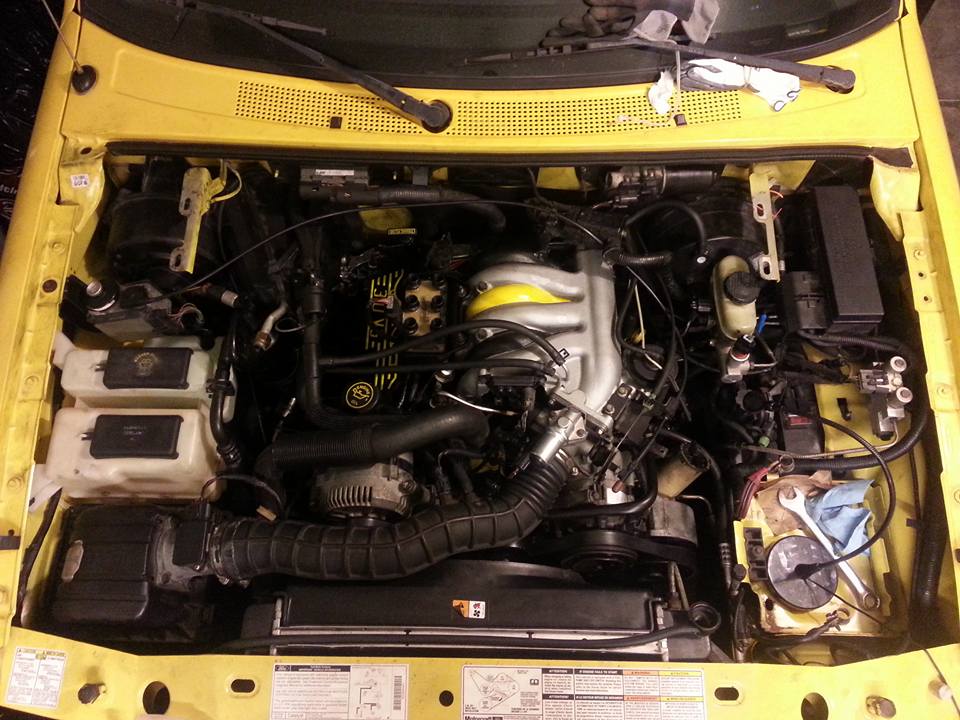
Got the intake off (the manifold that connects to the heads) and notice the seals are broken. While yes, this is a common thing to occur when taking the intake off, the odd thing is how they appear to be broken and still very much so stuck to the heads still. See the 1st and 2nd pics. On the seals you can clearly see the indention of metal where the intake manifold was first installed and lined up properly. You can also see how the gasket appears to have broken and shifted "while" installed (before I removed the intake) because, of several indications:
1. in the direction that the gasket shifted you can see where it pushed against the intake manifold bolts. Bolts were not in while I removed the intake, so hmmm, not sure how else they got there.
2. you can see where it moved and kinda scraped the gasket surface till it stopped and sat in this current position since who knows when.
3. I can tell this has been shifted/broken for quite some time (probably since soon after install) because of the shape of oil/debris build up around the intake ports on the heads, which follows the position of the broken gasket
4. Note the break in the gasket is right through where cylinder 2 is, same on the other side too for cylinder 5 (center cylinders on either side, those that were chewing oil).
Oil issue solved?:
If I'm not mistaken; under the intake manifold, between the heads it appears that area is open further down to more parts of the engine and that oil would be flowing all in/around that area. If in fact these intake seals have been broken like this for some time, wouldn't oil be going through the breaks in the intake gaskets and into those intake ports on the heads for those 2 cylinders thus pointing to the oil consumption issue?
New compression issue found:
Went ahead and decided to take the heads off to check into the recent compression issue and found what you see in the other pics; the exhaust valve was burnt up and destroyed. Luckily it appears no pieces fell into the cylinder as the walls have no indication of scratches or debris. I still have yet to pull off the other head because, it was getting late the other night. I plan to pull it as well soon of course. It appears this happened due to too much fuel. Could the too much fuel have been caused by the fact that the broken intake seal which seems to be blocking a good 10-20% of those 2 center intake ports on the heads?
Question for resolving all issues:
Please give me some suggestions as to how I should properly approach this. (and no suggestion for different engine. while it would be nice I'd rather not take on more than I can handle and I need this truck back on the road asap)
1. Complete rebuild: this is something I could swing if I had to. Would only cost me $1500 and 3-4days at local machine shop after I pull engine myself and put it all back in. Would even go ahead and have all injectors (new and old) inspected just in case.
2. Should I even attempt a cheap route such as:
- Leave heads and valve seats alone (do you think valve seats would still be ok since they don't appears to be broken, warped or falling out), and just replace the burnt out valve.
- Get new gaskets for heads and intake and this time put RTV sealant on intake gaskets too, assuming that could have infact been the oil consumption issue.
- Put it all back together and see how it goes for a while, Of course with oil change and new spark plugs.
So when they had the heads re-machined they put in harder valve seats (non-flex fuel to help with longevity) and put in new gaskets of course. Everything ran like a champ for about a month. Then it ran out of oil on me one day. Come to find out that it now shews through about 2 quarts a week (avg. 140-210miles/week). Oil is not seen in driveway, changing oil and checking coolant shows no cross contamination there. It's coming out of the tail pipe and mostly white smoke during warm up or after idling long, otherwise don't notice much/if any smoke while on the road.
Checking spark plugs I could see that oil was clumping up on them in cylinders 2&5 (center cylinder on both sides), all other cylinders are fine. It was suggested that I check simple things like PCV valve, idle control valve, and fuel injectors (went ahead and replaced those items with all new parts myself as suggested). Still no change, no worse no better on oil consumption.
Now go forward a few months or so to today; driving it home one day and all of sudden it starts running like crap, like it did originally when valve seats were falling out. This prompted me to bust out the Haynes manual, borrow a loaner car from family, and take a stab at it myself. This is where things get weird IMO and before you skip and just reply, "piston rings shot for oil issue, and too much fuel burnt your valves, you need rebuild..." just stay with me.
Got the intake off (the manifold that connects to the heads) and notice the seals are broken. While yes, this is a common thing to occur when taking the intake off, the odd thing is how they appear to be broken and still very much so stuck to the heads still. See the 1st and 2nd pics. On the seals you can clearly see the indention of metal where the intake manifold was first installed and lined up properly. You can also see how the gasket appears to have broken and shifted "while" installed (before I removed the intake) because, of several indications:
1. in the direction that the gasket shifted you can see where it pushed against the intake manifold bolts. Bolts were not in while I removed the intake, so hmmm, not sure how else they got there.
2. you can see where it moved and kinda scraped the gasket surface till it stopped and sat in this current position since who knows when.
3. I can tell this has been shifted/broken for quite some time (probably since soon after install) because of the shape of oil/debris build up around the intake ports on the heads, which follows the position of the broken gasket
4. Note the break in the gasket is right through where cylinder 2 is, same on the other side too for cylinder 5 (center cylinders on either side, those that were chewing oil).
Oil issue solved?:
If I'm not mistaken; under the intake manifold, between the heads it appears that area is open further down to more parts of the engine and that oil would be flowing all in/around that area. If in fact these intake seals have been broken like this for some time, wouldn't oil be going through the breaks in the intake gaskets and into those intake ports on the heads for those 2 cylinders thus pointing to the oil consumption issue?
New compression issue found:
Went ahead and decided to take the heads off to check into the recent compression issue and found what you see in the other pics; the exhaust valve was burnt up and destroyed. Luckily it appears no pieces fell into the cylinder as the walls have no indication of scratches or debris. I still have yet to pull off the other head because, it was getting late the other night. I plan to pull it as well soon of course. It appears this happened due to too much fuel. Could the too much fuel have been caused by the fact that the broken intake seal which seems to be blocking a good 10-20% of those 2 center intake ports on the heads?
Question for resolving all issues:
Please give me some suggestions as to how I should properly approach this. (and no suggestion for different engine. while it would be nice I'd rather not take on more than I can handle and I need this truck back on the road asap)
1. Complete rebuild: this is something I could swing if I had to. Would only cost me $1500 and 3-4days at local machine shop after I pull engine myself and put it all back in. Would even go ahead and have all injectors (new and old) inspected just in case.
2. Should I even attempt a cheap route such as:
- Leave heads and valve seats alone (do you think valve seats would still be ok since they don't appears to be broken, warped or falling out), and just replace the burnt out valve.
- Get new gaskets for heads and intake and this time put RTV sealant on intake gaskets too, assuming that could have infact been the oil consumption issue.
- Put it all back together and see how it goes for a while, Of course with oil change and new spark plugs.

Senior Member
Joined: Jun 2010
Posts: 16,670
From what you describe and looking at the pix , when the heads were rebuilt they resurfaced the heads and with that they should have told you to have the intake manifold resurfaced also. When the heads are resurfaced they sit lower on the engine block and if the intake is not shaved also , it will sit too high on the heads. If all new valves were not installed when the heads were rebuilt I would find another machine shop.
Thread Starter
|
Junior Member
Joined: Jun 2015
Posts: 4
From: Jax FL
So I went back to my mechanic that sent them off and he no longer deals with that machine shop (for other reasons). The paper work on what the machine shop did doesn't include the amount in which they resurfaced, but the mechanic ensures me they did resurface, just not sure how much. He also says he's never heard a machine shop suggest it.
Makes since to me though, I guess really depends on how much they take off and the engine layout. I guess any resurfacing might warrant a specific amount to trimmed from other parts like the intake in this case in some cases, good to know.
Makes since to me though, I guess really depends on how much they take off and the engine layout. I guess any resurfacing might warrant a specific amount to trimmed from other parts like the intake in this case in some cases, good to know.
Thread Starter
|
Junior Member
Joined: Jun 2015
Posts: 4
From: Jax FL
Rebuilt by "Precision Crankshaft Service Inc"
$1500
Address: 466 Lime St, Jacksonville, FL 32204
Phone 904) 354-1359
Labor for removal and install of engine = Me
They purchased a rebuild kit which included new over-size pistons, rings, bearings, lifters, oil pump, etc. and used new heads.
They checked and reconditioned (as needed) cams and crank shaft, rockers, rods, and anything else that doesn't come in the kits.
For the block they bored 30-over (no sleeves)
They also saw no damage to old rings so pretty sure I was right in that oil was seeping in through intake due to intake-to-heads seal. Still no idea why that seal failed...
Timeline:
June - Parked in garage and sat till around August
August - when I started tearing it down (about the time I got the funds to begin)
Aug. 17th - engine taken in
Aug. 21st - picked up rebuilt engine, and began putting back together (painting held me up / took the longest)
September 12th - finally finished and started for first time.
----------------------------------------
What else was replaced:
- Steering pinion boot (actually pinion boot was wrong lol, had to modify it to fit over joint that connects to steering assembly)
- Water pump
- idle pulley
- tension pulley
- crank position sensor (did not need tool, see notes below - Motocraft brand as recommended)
- x3 O2 sensors, had to get another because I didnt understand upstream/downstream difference, so second one at engine is Bosch whereas other two are Ultra-Power brand)
- PCV valve
- other various air hoses
Did not use or unable to put in parts ordered:
- Engine mounts (would require removal of suspension on passenger side - left both alone but I have the parts...)
- EGR feedback hoses (should have inspected before buying, they actually do not appear to be damaged or have rot look to them)
- Did not replace any coolant hoses... running low on funds at the time and they all seemed to be in decent shape. None appear to be leaking after all done too so I guess I'm lucky there ;D
--------------------------------------
Timing set with Crank position sensor:
- did not need special tool as most suggest BECAUSE, I was able to deduce through lots of forums and write ups that the tool "in this case / for our truck" keeps the sensor's tooth in the center of the gap. Based on that I performed everything else in getting to TDC, aligned timing notches on dampener to 0, and dropped the sensor in to where that gap (with tooth held center of gap) facing ~30 degrees when all the way down against block. Worked flawlessly, runs like a champ!!!
--------------------------------------
Notes on install and first run:
Got everything installed (no left-over bolts), all fluids added (conventional oil 5-30w + separate zinc additive), disconnected coil-pack and turned the engine over for about 5-10sec to circulate some oil (pump was already primed with assembly grease), I then reconnected coil-pack and turn the key - fired right up! It threw some smoke on crank, but only for a for a few seconds, everything sounded fine, no engine lights at all, and I let it warm up. Took it around the block a couple times, left idle for a few min, and drove it to friends house (9 miles / 25min - down shifting / engine braking at every chance I got + alternating RPM but never over 3k). We let it cool for a couple hours or more and the drove it to my parrents, let cool, and then drove it home.
*** Before you stop and say something about priming, see here now...
- Yes, I recognize the benefits of priming with a drill or something similar, and do see "potential" as to why it would be bad without.
- Yes, I realize I made a noob mistake, was too excited to be finished and rushed to turn key before reading on best practice for first start up (thought I had it all figured out lol).
- I did at least have in my head that I would like some oil circulated prior and at least cranked for 5-10sec with coil unplugged, not sure if/how effective it was, but I'd say "maybe" better than nothing...
- Heard of priming only after the fact, felt pretty worried, until I came across the following forum (kinda hard to find "starting rebuilt engine without priming" to firm up with more examples), see post from "RB69SS396Conv" and "Dave427"
Priming oil in engine.Using drill vs. cranking over? [Archive] - Chevelle Tech
(was able to find more people saying auto plants dont prime or break in at all)
- Plus there's the fact that I had over 100 miles with running perfect.
From there on we drove it here and there a little, eventually replaced cat. converters, still no Engine lights, and highest RPM hit has been around 4k once or twice on accident, and 3.5k a number of times, but not much. Always down-shifting / engine breaking at almost every chance I get to help wear in high/low points according to suggestions.
Started noticing somewhat loud (depends on definition of loud) ticking coming from engine after it has been under load for a while or prolonged idle after warm up. Cold startup = no noise (can hear injectors a little, but no where near as loud as ticking I'm hearing - similar in tone though), let it warm all the way up = still no loud ticking, take it down the road and back - slight ticking, take it to the store and yes you will notice it. You dont hear it in the cab unless windows down and going by something for sound to bounce back at you from.
Called place that rebuilt engine, told them my priming technique (they did not approve lol), but also said that lifters could possibly just have air in them still and cause some chattering (ticking noise). Failed to describe to them though that ticking only comes on after being under load.
Hard to find exact scenario on forums. Even seen one where person asked if ticking was coming from top or bottom of engine (no answer was given, not sure where they were going with that). Although, when I went under the truck at muffler shop to inspect their work, I put my head under the engine which was running and ticking does seem to be coming from under the engine because it was much louder there, near rear of engine where it meets the tranny.
May just need to make another forum post. At a minimum I may need to take valve covers off to inspect rockers and rods as well as torque specs on rockers just to be sure. All those scenarios where people were suggested to check that though sound like the person had ticking right at cold crank where as mine is only after load or long idle... My buddy's old Cobalt has similar tick and it's much louder, has had tick for years now (transmission???). EGR valve has some rattle to it when throttle is hit, but definitely not source of noise, just fyi. Another thing to note is that some cases of exhaust leaks can produce ticking according to forums, but muffler shop never mentioned anything there.
First oil change still yet to be done, but plan to do it between 500-750 miles (very close). Will do another conventional oil 5-30w with zinc additive again. Heard of ticking going away after first oil change...
Still need fluids flushed/changed for Tranny and Rear-end too.
$1500
Address: 466 Lime St, Jacksonville, FL 32204
Phone
904) 354-1359Labor for removal and install of engine = Me
They purchased a rebuild kit which included new over-size pistons, rings, bearings, lifters, oil pump, etc. and used new heads.
They checked and reconditioned (as needed) cams and crank shaft, rockers, rods, and anything else that doesn't come in the kits.
For the block they bored 30-over (no sleeves)
They also saw no damage to old rings so pretty sure I was right in that oil was seeping in through intake due to intake-to-heads seal. Still no idea why that seal failed...
Timeline:
June - Parked in garage and sat till around August
August - when I started tearing it down (about the time I got the funds to begin)
Aug. 17th - engine taken in
Aug. 21st - picked up rebuilt engine, and began putting back together (painting held me up / took the longest)
September 12th - finally finished and started for first time.
----------------------------------------
What else was replaced:
- Steering pinion boot (actually pinion boot was wrong lol, had to modify it to fit over joint that connects to steering assembly)
- Water pump
- idle pulley
- tension pulley
- crank position sensor (did not need tool, see notes below - Motocraft brand as recommended)
- x3 O2 sensors, had to get another because I didnt understand upstream/downstream difference, so second one at engine is Bosch whereas other two are Ultra-Power brand)
- PCV valve
- other various air hoses
Did not use or unable to put in parts ordered:
- Engine mounts (would require removal of suspension on passenger side - left both alone but I have the parts...)
- EGR feedback hoses (should have inspected before buying, they actually do not appear to be damaged or have rot look to them)
- Did not replace any coolant hoses... running low on funds at the time and they all seemed to be in decent shape. None appear to be leaking after all done too so I guess I'm lucky there ;D
--------------------------------------
Timing set with Crank position sensor:
- did not need special tool as most suggest BECAUSE, I was able to deduce through lots of forums and write ups that the tool "in this case / for our truck" keeps the sensor's tooth in the center of the gap. Based on that I performed everything else in getting to TDC, aligned timing notches on dampener to 0, and dropped the sensor in to where that gap (with tooth held center of gap) facing ~30 degrees when all the way down against block. Worked flawlessly, runs like a champ!!!
--------------------------------------
Notes on install and first run:
Got everything installed (no left-over bolts), all fluids added (conventional oil 5-30w + separate zinc additive), disconnected coil-pack and turned the engine over for about 5-10sec to circulate some oil (pump was already primed with assembly grease), I then reconnected coil-pack and turn the key - fired right up! It threw some smoke on crank, but only for a for a few seconds, everything sounded fine, no engine lights at all, and I let it warm up. Took it around the block a couple times, left idle for a few min, and drove it to friends house (9 miles / 25min - down shifting / engine braking at every chance I got + alternating RPM but never over 3k). We let it cool for a couple hours or more and the drove it to my parrents, let cool, and then drove it home.
*** Before you stop and say something about priming, see here now...
- Yes, I recognize the benefits of priming with a drill or something similar, and do see "potential" as to why it would be bad without.
- Yes, I realize I made a noob mistake, was too excited to be finished and rushed to turn key before reading on best practice for first start up (thought I had it all figured out lol).
- I did at least have in my head that I would like some oil circulated prior and at least cranked for 5-10sec with coil unplugged, not sure if/how effective it was, but I'd say "maybe" better than nothing...
- Heard of priming only after the fact, felt pretty worried, until I came across the following forum (kinda hard to find "starting rebuilt engine without priming" to firm up with more examples), see post from "RB69SS396Conv" and "Dave427"
Priming oil in engine.Using drill vs. cranking over? [Archive] - Chevelle Tech
(was able to find more people saying auto plants dont prime or break in at all)
- Plus there's the fact that I had over 100 miles with running perfect.
From there on we drove it here and there a little, eventually replaced cat. converters, still no Engine lights, and highest RPM hit has been around 4k once or twice on accident, and 3.5k a number of times, but not much. Always down-shifting / engine breaking at almost every chance I get to help wear in high/low points according to suggestions.
Started noticing somewhat loud (depends on definition of loud) ticking coming from engine after it has been under load for a while or prolonged idle after warm up. Cold startup = no noise (can hear injectors a little, but no where near as loud as ticking I'm hearing - similar in tone though), let it warm all the way up = still no loud ticking, take it down the road and back - slight ticking, take it to the store and yes you will notice it. You dont hear it in the cab unless windows down and going by something for sound to bounce back at you from.
Called place that rebuilt engine, told them my priming technique (they did not approve lol), but also said that lifters could possibly just have air in them still and cause some chattering (ticking noise). Failed to describe to them though that ticking only comes on after being under load.
Hard to find exact scenario on forums. Even seen one where person asked if ticking was coming from top or bottom of engine (no answer was given, not sure where they were going with that). Although, when I went under the truck at muffler shop to inspect their work, I put my head under the engine which was running and ticking does seem to be coming from under the engine because it was much louder there, near rear of engine where it meets the tranny.
May just need to make another forum post. At a minimum I may need to take valve covers off to inspect rockers and rods as well as torque specs on rockers just to be sure. All those scenarios where people were suggested to check that though sound like the person had ticking right at cold crank where as mine is only after load or long idle... My buddy's old Cobalt has similar tick and it's much louder, has had tick for years now (transmission???). EGR valve has some rattle to it when throttle is hit, but definitely not source of noise, just fyi. Another thing to note is that some cases of exhaust leaks can produce ticking according to forums, but muffler shop never mentioned anything there.
First oil change still yet to be done, but plan to do it between 500-750 miles (very close). Will do another conventional oil 5-30w with zinc additive again. Heard of ticking going away after first oil change...
Still need fluids flushed/changed for Tranny and Rear-end too.

Thread
Thread Starter
Forum
Replies
Last Post
93f250xlt4x4
Ford F-250 & Ford F-350
3
Jan 13, 2010 07:53 AM